Thursday, July 10, 2014

Blessed Again!

I am once again amazed by the goodness of our Lord! He has given us a perfectly healthy son to add to our family.

"...Now unto him that is able to do exceeding abundantly above all that we ask or think, according to the power that worketh in us, Unto him be glory in the church by Christ Jesus throughout all ages, world without end. Amen." Eph 3:20-21


Thursday, June 19, 2014

Great tip for kids on iPhones or iPads

Here is a great tip I learned today. I rarely let my two year old play with my phone for fear of her deleting apps or moving them around. Here is a way that you can lock your child in an app and they can't get out of it.

1. Go to your Settings / General / Accessibility
2. Turn on Guided Access and set a passcode

Now to make it work. Open the app you want to use and triple-click the home button. It will ask you what parts of the screen you want to disable and then you can tap on start. Now when your child pushes the home button they will not be allowed to exit that app.
To exit you just triple-click the home button and type in the passcode.

This combined with Jane's find of Kids Tube is great entertainment when your child needs a distraction. :)

Saturday, June 14, 2014

Easy Sushi at Home

Sushi is another great lunch or dinner idea for those that are seeking new ideas constantly like me. :)
I found this site with great instructions for making sushi rice.
I don't have sushi tools such as a bamboo mat, rice paddle, wooden bowls, etc. I don't think they are really that necessary. I roll my sushi with a piece of plastic wrap and it works fine.
Today I made some with leftover cooked salmon from my fridge and avocado and it tasted great.
Try it - You'll like it. Put whatever fillings you want in the middle.


Saturday, May 24, 2014

Great Vacation Moments

We had a wonderful vacation together with family and many friends. Here are some of my favorite shots.

Ruth rides a wave with her daddy.

Kathy has a purpose in her walk, it was just worth filming.


John and Kathy picture tradition


God's amazing painting just for us.


Monday, April 28, 2014

Phase 3 - Cabin Completion

We spent this last weekend up at the cabin again doing the final coats of finish on the wood floors.
Site-finished hardwood floors are very beautiful when they are done. Lots of work though.

 Spreading the final coat of finish.

 Yes, the custom cabinets are gorgeous too. Made by the greatest local custom cabinet maker here. 

This is what the finish looks like when it's dry.  
The upstairs and stairs are finished as well. No pictures though.

Ruth and Kathy exploring together.

Tuesday, March 11, 2014

Cabin Project - Phase 2

This last weekend was our second trip to the cabin to make more progress on the flooring. Long hard work days for the men and Liz. The rest of us got to feed them and enjoy the children playing, exploring, catching frogs, etc...

(One of my favorite shots)

Kathy showed John that watching the water lands on your pants is fun

(The Happy Couple :)

(Kathy has looks for sure. "Mom, someday I will drive this ATV")

Tree climbers

Hans tiles the closet and the bathroom.

Tiled and sealed - not finished yet.


Jason sands the floor multiple times
 
Almost finished tile - just needs grouted.

Downstairs is now sanded and sealed ready for final finish next trip.

Upstairs is sanded. Sealing and finish to happen next trip.

Note- If any of you future house builders have flooring questions; don't hesitate to call. Even the choice of foundation can play a critical part. :)

Wednesday, February 26, 2014

Braised Cabbage

Braised cabbage is one of those dishes that I make and then forget about it for a long time until I remember again. This recipe was introduced to me by my dear newest sister :)
It does cook for two hours, so plan ahead.

Braised Cabbage from nomnompaleo
2 tbls butter, oil, lard, or bacon grease for coating the baking dish
1 medium head green cabbage (about 2 pounds)
1 large red or yellow onion, peeled and thinly sliced
2 large carrots, peeled and cut into 1/4-inch coins (or throw baby carrots in)
1/4 cup broth or water
1/4 cup melted butter, lard, or your choice of grease
salt and pepper
Aged balsamic vinegar

1. Preheat oven to 325. Grease 9x13 baking dish
2. Lop off the tough stem end of the cabbage and divide it into 6-8 wedges. Keep the core attached so the wedges stay intact after the long cooking time. The core will get super tender.
3. Place cabbage wedges in a single layer in the greased dish - a little overlap is ok. Toss the onions and carrots on the top. Drizzle with broth and melted fat. season well with salt and pepper. Cover tightly with foil and place in the oven.
4. Cook for and hour, then carefully flip the wedges over. reseal foil and cook for another hour.
6. Drizzle with balsamic vinegar and serve immediately.

I made this last night but didn't take a picture, so I this is the one from the website.

Thursday, February 20, 2014

Why I Mill My Own Grains

I hear some of my friends are expressing an interest in milling their own flours and grains.

I started milling about a year ago. I don't even remember that exact reason I wanted to start milling. Maybe it was hearing so much against wheat that made me want to find out about it. I know there are some people with gluten sensitivities; but for everyone else wheat is a good thing.

When God created us, He said Very Good. I believe He made our bodies wonderful working machines. You do have to care for and maintain any machine. Our bodies need a constant and good supply of vitamins and minerals. Hence, the number one reason to mill your own grains. It's the beginning of a path to eating real food. Real food is food that has not been processed.

Fresh milled wheat has an abundance of vitamins and minerals necessary for your health. Of course fruits and vegetables have vitamins and nutrients as well but these nutrients don't last long on fresh produce. Wheat lasts almost forever until you mill it.

Most of my research and information comes from Bread Beckers. They have many great articles worth reading that answer a lot of questions about wheat, etc. Here is a good article to start with -  Bread of Idleness


Here are a few tips that I have learned in working with fresh milled whole wheat.

- There are basically four types of wheat. Hard Red, Hard White, Soft Red, Soft White.
here is a link to the basic nutritional value for each from the Einkorn website. Einkorn wheat is certainly the best, however it also costs about three times as much as any other wheat. Einkorn wheat has not been hybridized. (FYI-Wheat has not been genetically modified like corn and soy, wheat has been hybridized in order to grow in drier climates, etc)

- Only Hard white or red will work with any recipe with yeast. Soft white and red is for cookies, pastries, pizza crust, tortillas, etc. (There isn't much nutritional value in the Soft grain so I usually always use the Hard)

- Whole wheat flour is very dry. When baking with it, lean to the side of less flour and less cooking time.

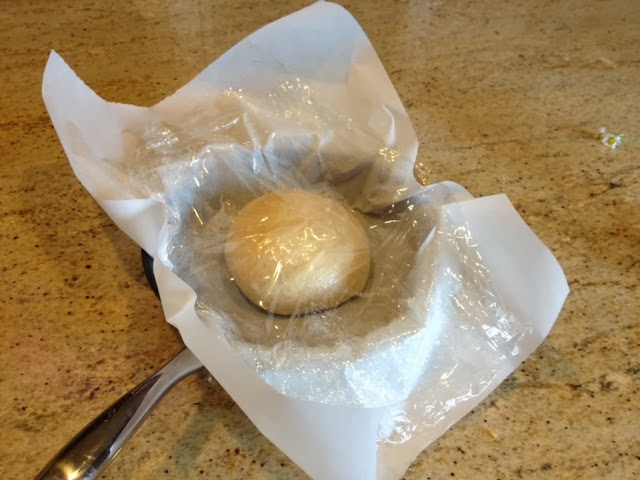
- When making bread, give your dough time to soak in all the liquid before you think you should add more flour. I let mine sit for at least 20 minutes.

- Your basic whole wheat bread dough should not feel dry, it should feel tacky.

- Store your extra milled flour in the freezer, along with your brown rice to prevent rancidity and oxidization.

- If a recipe gives the flour measurement in weight then use your scale. You will have consistent results.

- Converting recipes - For most baking recipes, I will change the flour, sweetener, and oil. For flour, usually whole wheat, oat, rice, or quinoa flour. There are so many more flour options that I haven't even experimented with yet - barley, buckwheat, spelt, millet, etc... For sweetener I will use Sucanat which is basically dried honey granules. If you use honey keep in mind that you are changing the liquid ratio. For the oil I'll use coconut oil and or applesauce.

Disclaimer - I am no scientist, nutritionist, doctor, researcher, nor do I claim to know very much at all. I only have benefitted greatly by milling my own flour. My children rarely get sick besides the common cold. One daughter had exzema that disappeared after a month of home milling. There are many other testimonials out there from people that have switched to eating a diet filled with Real food. 


Wednesday, February 19, 2014

Quick Whole Wheat Garlic Herb Bread

Here's a really quick savory bread you can make for dinner anytime. Only takes an hour at the most.

Whole Wheat Garlic Herb Bread

3 cups flour (your choice combination of hard white wheat and unbleached all purpose)
3 Tbs sugar or whatever sweetener you choose
1 Tbs baking powder
1 tsp salt
4 cloves garlic, minced or pressed through a garlic press
1 tsp dried rosemary
1 tsp dried thyme
1 tsp dried oregano
1 bottle (12 ounces) beer (i used a pale ale)
4 Tbs butter, melted

1. Preheat oven to 350. Grease a 9x5x3 inch loaf pan.
2. In a medium bowl, combine all the dry ingredients. Gently stir the beer into the dry mixer just until moistened.
3. Pour half of the melted butter into the loaf pan. Make sure it evenly coats the bottom.
4. Put your batter in the pan. pour the other half of the butter on top and use a pastry brush to evenly coat the top.
5. Bake for 50 minutes or until a knife inserted in the middle comes out clean.

NOTE- I'm not a huge herb fan so I put about half a teaspoon of each herb. It's still delicious.


Monday, February 17, 2014

My Favorite Sandwich Bread Recipe

This recipe is the one I keep coming back to, even after trying so many other whole wheat recipes. This one I think yields the right texture that you find in store bought bread.

Whole Wheat Sandwich Bread (adapted from Bread Beckers basic bread recipe found in their recipe book)

1 cup hot water
1/2 cup milk
1/3 cup EVO oil
1/4 cup honey
2 tsp salt
1 egg (I use an egg because I can't find Lecithin locally)
4 - 4 1/2 cups hard white wheat (or your combination of hard white and hard red)
1 Tbs instant yeast

NOTE - if you don't like dairy then feel free to use all water and omit the egg. If you omit the egg then add 2 Tbs. of Lecithin.

1. Combine liquids and salt in mixer.
2. Add 2 cups of the flour, add the yeast,  add two more cups of flour.
3. Mix for a couple minutes with the paddle attachment. It will look very wet.
4. Let dough rest for 20-25 minutes to allow the flour to absorb the liquid.
5. Mix on low speed with your dough hook for 6-8 minutes. Add more flour in very small increments if necessary. (I normally don't end up having to add more flour.)
6. If you choose, you can knead by hand a few times with oil not flour before transferring to a lightly oiled bowl.
7. Cover and let rise for 1-2 hours until doubled in size.
8. Shape into a loaf. I like to flatten and roll my dough into a large rectangular shape and then tightly roll it.
9. Let rise in loaf pan uncovered for about 30 minutes.
10. Bake at 350 for approx. 45 minutes.

Note - this recipe makes one large 2 lb loaf. An 8"x3" loaf pan is a 1 lb loaf size. You can divide this recipe into two 1 lb loaves and bake it for 25-30 minutes.


Sunday, February 16, 2014

Our Weekend Together

The family that receives together....pays together. 
We just got to go to our dentists cabin this last weekend to begin phase one of paying off some years of accumulated trade. (pricey smiles) Phase one is installing hardwood in their new cabin.
It was a lot of work for the guys (and Liz) and some great fun moments as well. 
(It's ok Joe, we are covering your portion too. ;)


Hans finishes the living room area.

Stefan does the bedroom with Joelle helping.

Jason (the master) handles the finishing pieces and details.

Liz runs the chop saw for everyone. (She's showing off her gorgeous teeth)

Here is Sue being such a patient and loving wife.


Clean up time


Jason takes the girls for a ride

Another great dinner together

John & Kathy only need water and buckets.

Before we left the driveway, Kathy was out. Play hard=sleep hard.

Soon we will be going back to complete phase two of sanding and refinishing the hardwood. I'll get some nicer pictures then.

Tuesday, February 11, 2014

Almost No-Knead Bread

I personally haven't had a lot of success with the popular no-knead bread recipe, especially using whole wheat flour.  I really like this recipe though.

Almost No-Knead Bread from America's Test Kitchen

1 1/2 cups (7 ounces) fresh milled hard white wheat flour
1 1/2 cups (8 ounces) all-purpose flour
1 1/2 tsp salt
1/4 tsp instant yeast
3/4 cup plus 2 tbls water, room temperature
2 tbls honey
6 tbls mild flavored lager, room temperature (ATK says lager is the beer of choice because of how it is fermented)
1 tbls distilled white vinegar
vegetable oil spray

1. whisk flour, salt, and yeast together in a large bowl.
2. Dissolve honey in water
3. Add water, beer, and vinegar to flour mixture. Using a rubber spatula, fold from bottom of bowl until shaggy ball forms.
4. Cover bowl with plastic wrap and let sit at room temperature for at least 8 hours or up to 18 hours.
5. Lay 18 by 12 inch sheet of parchment paper inside 10 inch skillet and spray with vegetable oil spray.
6. Transfer dough to lightly floured surface and knead by hand 10 to 15 times. Shape dough into ball by pulling edges into middle. place dough seam side down in parchment lined skillet. spray lightly with oil spray and loosely cover with plastic wrap. let rise at room temperature for 2 hours.
7. Adjust oven rack to lowest position. lightly flour top of dough and using a sharp serrated knife, make one 6-inch long, 1/2 inch deep slash along top of dough. pick up loaf by lifting parchment paper and lower into dutch oven. let any excess parchment hang over the edge.
8. cover pot and place in oven. Turn on oven to 425. When oven reaches 425, bake for 30 minutes. Then remove lid and continue baking until golden brown and internal temperature reaches 210. (recipe says 20 to 30 minutes longer but mine only took 10 minutes longer)
9. carefully remove pot and bread from pot and cool on rack for 2 hours before slicing (HA!-fresh bread will not wait 2 hours to be cut into in my house.)


(I did overcook it and it burned on the bottom; but that part was easily cut-off and the rest was enjoyed.)

Saturday, January 25, 2014

Carrot and Zucchini Muffins

Carrot and Zucchini Muffins - Simple and Delicious

1 cup Oat flour
1/4 cup Quinoa flour
1/4 tsp sea salt
1 tsp baking powder
1/2 tsp baking soda
2 tsp ground cinnamon
1/3 unsweetened applesauce
1/3 cup honey
1 egg
1 tsp vanilla
1/2 cup grated carrots
1/2 cup grated zucchini


1. Whisk dry ingredients together in a bowl
2. Whisk wet ingredients together.
3. Add carrot and zucchini to the wet ingredients.
4. Add wet ingredients to flour mixture.
5. Divide evenly into mini muffin pan and bake for 15 minutes at 350.


Thursday, January 9, 2014

Delicious Fresh Salad

Fresh & Tasty Cabbage Salad

Green Cabbage - shredded
Red Cabbage - shredded
Apple - grated
Carrot - grated
Celery -shredded
Zucchini - diced
Radish - thinly sliced
Lemon - zested and juiced
craisins

1. Combine in a bowl and drizzle lemon juice over it all. Yum!